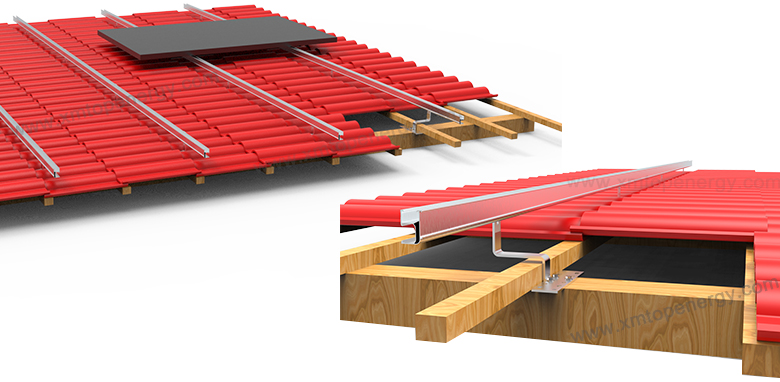
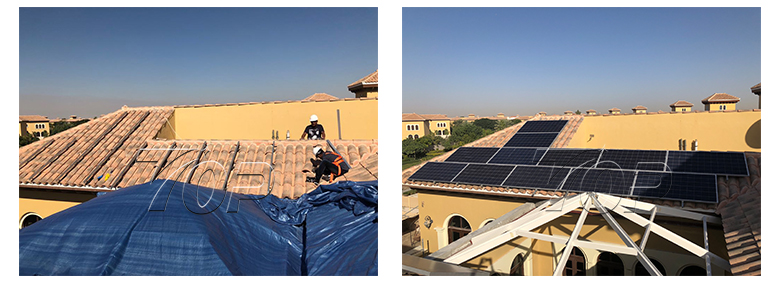
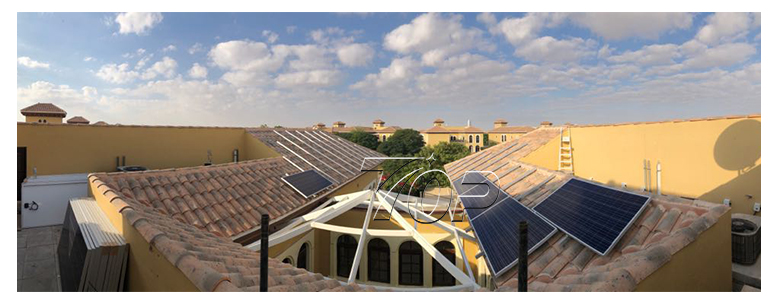
太陽タイル屋根マウントシステム ほとんどのタイプのタイル張りの屋根に合わせて設計された高品質で耐久性のあるステンレス鋼の屋根フックが特徴です。 さまざまなスタイルで利用できるこれらのフックは、安全で適応性のあるインストールを保証し、長期にわたるパフォーマンスのための優れた安定性と気象抵抗を提供します
材料:
Aluminum Alloy 6005-T5積雪量:
14kn/m²風荷重:
60m/s認証:
CE/SGS保証:
10 Years耐用年数:
25 Years出荷港:
Xiamen。概要
太陽タイルroof取り付け システム高品質がありますそしてv貪欲なスタイルほとんどのタイプのタイル張りの屋根に適したステンレス鋼の屋根フック。 TOPは、太陽マウントシステムを迅速かつ安全に設置し、太陽エネルギーがもたらす高効率リターンを楽しむことができます。
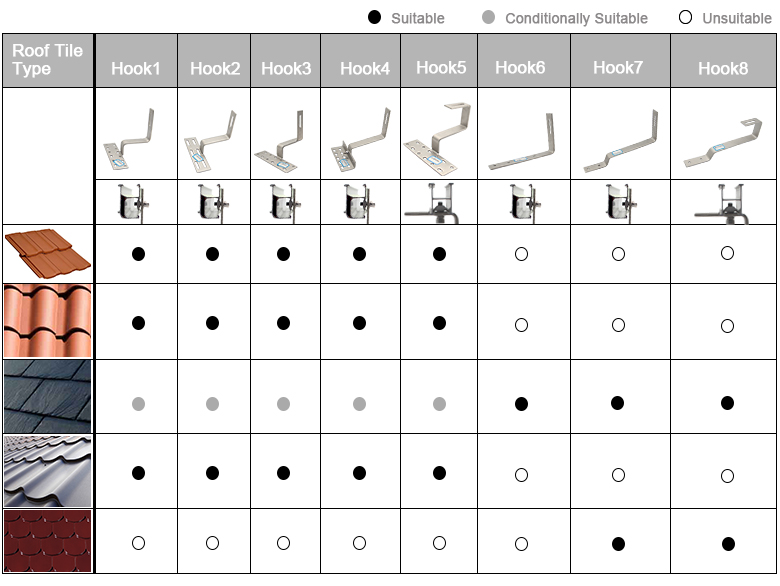
タイルルーフブラケットキットは、シンプルなインストールソリューションと私たちのSをサポートできますIDEマウントまたはランドスケープタイルインターフェイスを使用して、特別な取り付けニーズに応えることができます。 さまざまな屋根の種類については、選択できるさまざまなルーフフックを設計することをサポートしています。
rooofフックエクステンダーは、スペインのタイルなどの高波形タイルの設置の範囲の一部でもあります/ローマのタイル/ curvedタイルsなど
。製品の詳細


。パラメーターリスト
| 製品名 | タイル屋上ソーラー取り付けブラケット、スペインのタイル屋上マウント |
| 材料 | アルミニウム合金、ステンレス鋼 |
| 風負荷 | 60m/s |
| 雪の荷重 | 1。4kn/m² |
| モジュールオリエンテーション | 肖像画や風景 |
| 保証 | 10年 |
| サービスライフ | 20年以上 |
| CertificAiton | SGS、CE |
| コンポーネント | ソーラールーフフック、レール、モジュールクランプ |
t彼はタイルルーフソーラー取り付けシステムの特徴です:
1. 簡単なインストール:
私たちの汎用性 そして耐久性 レール、 モジュールクランプスプライスキットは、オンサイトカットの必要性を排除します. ドリルまたはカットする必要はありません、インストールは安全で信頼性があります. ソーラーパネルは、マッチングコンポーネントを使用して簡単にインストールできます。
2. 優れた互換性 :
私たちのタイル屋根エネルギーシステムはdですユニバーサルとしてsignedされました PVマウントシステム, ti市場にある主要な額入りのフレームレスPVモジュールのほとんどと互換性があります。 私たちのアルミニウム合金レールは私たちのユニークなデザインですが、それは 多くの 市場ソーラーフック互換性がある.
3. 専門的な解決策:
ルーフシステムでさまざまなシミュレーションインストールテストを実行します、r本物のルーフパネルのイゴステストにより、太陽光発電設備の安全性、コンプライアンス、構造的完全性を確保できます。
。インストール効果


屋根がきれいで、乾燥していて、破片がないことを確認してください。
日光への曝露と構造的サポートに基づいて、ソーラーパネルの最適な位置を特定します。
レイアウト計画に従って、タイル屋根の屋根フックを配置します。
セルフタッピングネジを使用して、屋根のフックを屋根の垂木に固定します。 ネジが垂木に浸透して、安定した耐久性のある接続を確実にします。
防水シールまたは点滅を使用して、ネジ穴の周りの漏れを防ぎます。
ソーラールーフレールを取り付けられたルーフフックに置きます。
取り付けブロックまたはブラケットを使用して、レールをフックに固定します。 レールがレベルであり、適切に整列していることを確認してください。
ソーラーレールのアライメントと安定性を再確認します。
すべてのボルトとネジを締めて、レールがルーフフックにしっかりと取り付けられていることを確認します。
ソーラーパネルを取り付けられたソーラーレールに慎重に置きます。
モジュールクランプ(ミッドクランプとエンドクランプ)を使用して、ソーラーパネルをレールに固定します。 ミッドクランプは隣接するパネルを接続するために使用され、エンドクランプはレールの端でパネルを固定します。
パネルが均等に間隔を置いており、しっかりと固定されていることを確認してください。
すべてのコンポーネントが適切に保護され、整列されていることを確認するには、インストール全体を検査します。
ゆるいネジや誤ったパネルなどの潜在的な問題を確認してください。
システムをテストして、正しく効率的に機能していることを確認します。
最初に安全:屋根で作業するときは、常にハーネスやヘルメットなどの適切な安全装置を使用してください。
メーカーのガイドラインに従ってください:ソーラーパネルとマウントシステムメーカーが提供するインストール手順を順守します。
防水:漏れを防ぐために、屋根の浸透を封印することに特に注意してください。
専門的な支援:ステップがわからない場合は、プロのインストーラーに相談して、システムが正しく安全にインストールされていることを確認してください。
。プロジェクト


。同様の製品

。 RFQ
迅速かつ簡単な計画 5つのステップ のソーラールーフ ピッチングされたタイル屋根の取り付けシステム。 私たちはできるだけ早くあなたに連絡して、あなたに最高を与えます 解決.
ステップ1:あなたのアドレス
ステップ2:風荷重、雪の負荷
ステップ3:屋根の種類、屋根の形状、屋根の覆い
ステップ4:建物の高さ、屋根のピッチ
ステップ5:連絡先メッセージ